


So this is my first blog kicking off a mini project. This is a good project for doing mass renaming. You can also utilize this for renaming the directories as well, but I will leave that to you to figure that out. After following through with everything we do here you should have an idea as to how that is done. This will not work if you are trying to rename a file and move it at the same time. For that, you will need a different command that I will list, but will not use as it will not be covered here. Also, please remember that there is more than one way to skin a cat, and that is most definitely the case in this situation. The method for mass file renaming depends on time, resources and complexity. This same process can additionally be done in Linux with the bash shell. The process is a little different for running, we can go over that in another tutorial. (the process is the same, but the command is different).
OK, so you get on a project and your team says "Hey our client has a new naming convention they want on all their documents we are going to be handing over. We need to ensure we are using a file naming convention throughout all the documents. Can you add the new convention, and update the ones that don't have one". You go to the project folder and see that all the files have first and last names and that is it. You can't identify what they are, but there is no order. To make matters worst there are over 5000 files. You are pulling your hair and thinking "Crap the names aren't in order and they are missing the convention format." You need to rename all these files, but there's no way you are going one by one, and then you remember that you are a "Power User" and know that PowerShell can take care of this.
Tools you will need:
1)PowerShell/ Windows PowerShell ISE; 2)Excel/ Office Libre; 3)Notepad
Operating System:
Windows 7/Windows 10/ Windows 11 ( if you don't use it. You can download the VM)
Commands:
- cd (change directory); 2) dir (directory listing); 3)\> (output redirection); 4)NewName (assigns a new name to file); 5) Rename-Item (renames file); 6) -Force.
File naming convention: FirstName_LastName_FileType_Date
Let's map out the process:
1) Get a list of all the files in the folder -To do this we need to navigate to the parent folder in PowerShell. -Run a command that will **recursively** list file names and exported the names to a document where we can edit the names.
2) Open the file in Excel and change the old name to the new name. - Create a new tab and copy the data into tab two to preserve the data - Clean the data
3) Identify the PoswerShell command that is going to help us change the old name to the new name. -Place the command in the order it needs to be for a single file to be changed. -Confirm it works by testing it on one file (Always need quality control/testing. Do not just try running the command on a large folder ).
a)Then apply the same command to the rest of the file names we have listed
b)Execute the script in PowerShell.
Total Estimated time: 30 to 45 minutes (maybe longer if you test and find out there are some errors. This is ok in my opinion since it's best to be safe)
Step 1- First navigate to the folder/ directory with the files that we need to change in the file manager the way you normally would using file manager. Then once you are at the folder, select the directory bar at the top and type: "Powershell".This is going to open up PowerShell and place you directly in the file path that corresponds with the location you are in within the file manager. If you need to get the file names of more than one folder you need to go to the parent directory. In some cases, you can try > cd .. See Figure-1 (for file directory); Fig-2 (for PowerShell console that opens).

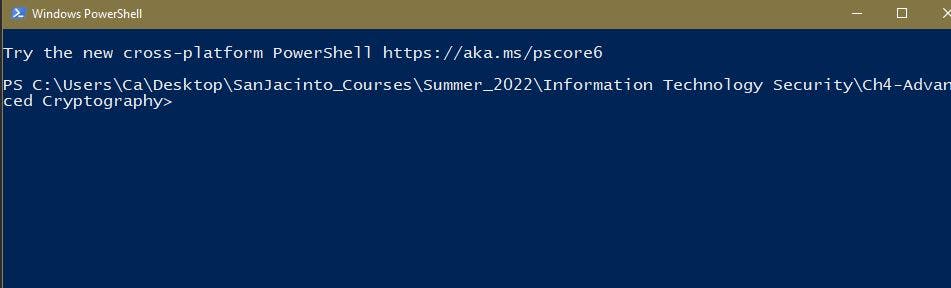
Step 1 (continued)- While the PowerShell terminal is open, type the following: dir > filenames_export.xls
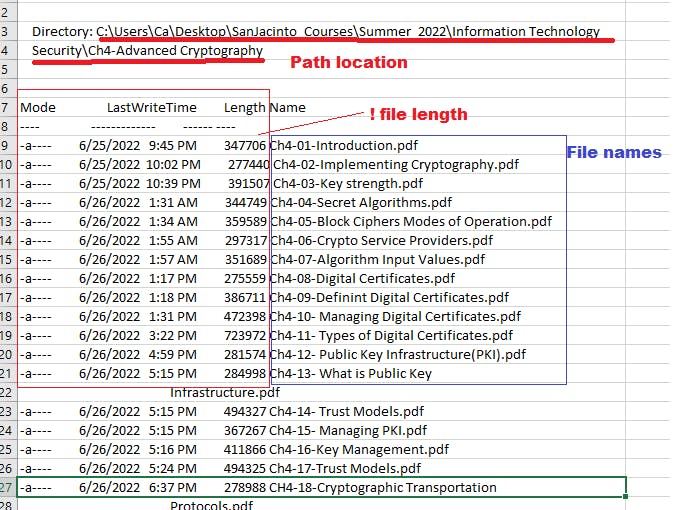
Note: don't use .xlsx, if you do you may get an error. After entering the command you should see a file that is created at the bottom of the folder with the exact name we specified. Open it. You may get something to the effect of " the file may be corrupted would you like to open it." Say yes. The output in the file should look similar to Figure-3 below.
Because we will be running the script from inside the folder, we don't need the full file path. So to do this we will do some quick cleaning, and removing of everything else. We will do this in excel/office Libre.
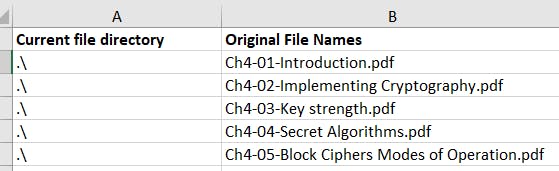
Step 2- Next we need to clean the data and format it. Upon opening the file you will notice that the data will all be placed under column "A". You can expand the column width as shown above.
Next, I would select the cells where the names of the file start. In my case, it is row 9. From there you can hold (ctrl + Shift) and use the down arrow. This will select all the cells going down.
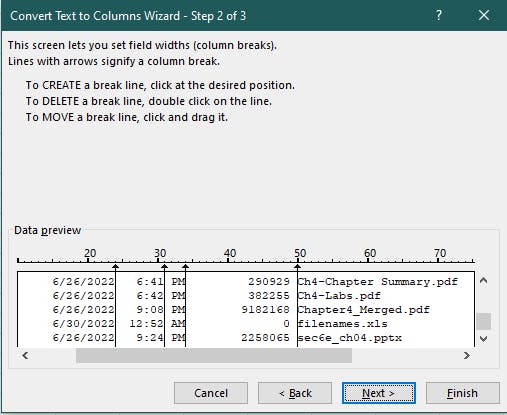
The rows should be highlighted. Next, go to the data tab in excel, and select "Text to Columns". This will split the data in the way we need. The window will pop up. Select "Fixed width", then hit the next button. Then you will see arrows appear in a data preview box. Where each arrow is placed is where the data will be split. Make sure there is an arrow right where the file name starts.
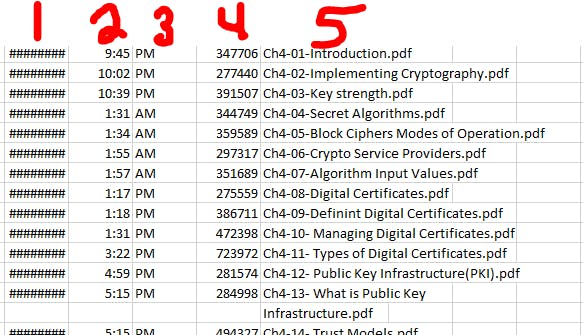
You can remove everything before the file names from columns 1 to 4.. See the image below. All we need is everything in column 5.
Next, you will want to copy the file names to another tab so that you can have a clean start with the file names. Once you copy them over, you should have all the file names on a new tab. Next, you want to insert a new column to the left, so we can place a current directory statement in front of the old file name. See the image below for an example.
Note: The following ( .\ ) just tells PowerShell to execute the command in the current directory. If you were to recursively name files, you would need the whole path. And you would need to add (-Recursive).
Step 3- Identify the PowerShell command we will need.
The PowerShell command we will need to run this is:
Rename-Item -Force -Path "directory location of files + filename" -NewName "new file name"
In my case using the information above I would write mine as follows:
Rename-Item -Force -Path ".\Ch4-01-Introduction.pdf" -NewName "CyberSecurity_AdvancedCryptography_Introduction.pdf"
Note: Notice that you do not need to add the directory location after you list it in the first part of the command. Also, here you will need to double-check that you don't have any file names going to the next row. If so you may want to make sure they are on one.
Next, we are going to integrate this using excel and apply it to all file names.
In column "D" at D2 place the first part of the command: -Force Rename-Item "
In column "E" at E2 place the directory path right before the file name:
In column "F" at F2 place the original file names along with the file extension. I just made it equal to "B2" because that is where I have the file names within this sheet.
In column "G" at G2 place the second half of the command : ' -NewName ' ( yes with the single quotations. We will concatenate these.
Next in Column "H" at H2 we can add the new name or extension.
Lastly, we want to concatenate these all together so that we have one column with the command and the pre-fixes we added or the new file names you may have chosen if you were following along. **It's important to remember you need spaces between command arguments and the file names.

Below is what it would look like when you concatenate all the columns together. I used the following excel formula, yours might be different: =CONCAT(D2,A2,B2,"'"," ",G2," ","'",H2,I2)

Next, we want to copy and paste values to a notepad and save it, with the file extension (.ps1), make sure you save it in the file location as the files that we are changing. If you are on a network, let's say at work, you will have to run it in the file, and sometimes locally.
Go to the search bar and search: PowerShell ISE. Should look like the image below.

Once this is open you can drag your PowerShell file that you created in the directory with all the files.
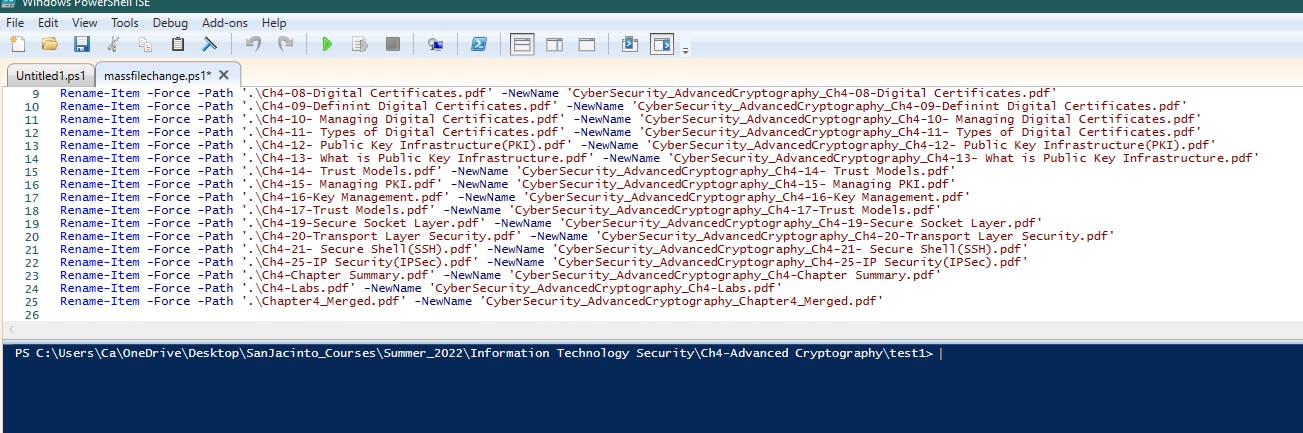
The only thing left is to run the program. You can do this by hitting the green button at the top of the PowerShell Window.
Conclusion:
After you do this a few times you can easily get this done within less than 30 min. There are faster ways to add prefixes, and suffix's to file names. I have found this is best when you are changing a lot of file names to some that are completely different. It allows you to load a list and concatenate them quickly. You can even make a VBA macro that lets you add the original file names, and the new ones on two columns and does everything in the backend. If you would like to see a VBA macro or have any ideas for something I should write about. Please let me know. This is my second blog.